ROOTING A PHONE:
ROOTING your phone may void warranty, Completely brick the device or even worse.
ROOT on your own risk.
The following tool and files are necessary to carry on the ROOTING process:
1. ROOT TOOL:
Link : http://www.mediafire.com/download/p5vauei9sd79oa1/RootZenFone5KitKat.zip
2. Intel Drivers:
Link : iNTEL Driver
3. A PC running Windows OS. (Preferably Win7 - as I used)
STRICTLY FOLLOW THE STEP BELOW :
1. Install the Intel driver first.
2. After its been installed, Connect your phone to the PC using USB cable. Before that, Make sure you switch on USB Debugging in the setting in the phone side. Its not easy to turn on debugging in ASUS Zenfone 5. Read the note below.
NOTE: In ASUS ZENFONE 5, the developer option is hidden by default. To enable this, Go to,
Settings -> About -> Software Information -> Build Number. (TAP 7 TIMES)
Then go back to,
Settings -> Developer Options -> USB Debugging -> Check it.
3. Test for authorized connection between phone and PC. To do this, Go to the downloaded ROOT TOOL Zip file, Extract the content to a folder and (hold shift and right click) "files" and select "Open command prompt here" type "adb devices" and press enter. The command prompt should return as below:

If unauthorized appears, you should not proceed. Unplug the device and plug in again and try until you get as displayed.
4. Please read the following instructions carefully. The upcoming is we will root your phone. Now, stay connected to your pc with your phone and open the folder you extracted "rootz5kitkatv2" from the download file. Double click "root-zenfone5-ww" or "Root-ZenFone5-en"
5. The bat file will open and the rooting process is now started. Your phone will reboot 5 to 6 times. Just press any key to continue. Wait for some more time until you see this last screen.

6. If your phone is locked and showing the lock screen and the ROOT process is stopped, Open the screen lock and Allow USB debugging (Press OK) to continue.

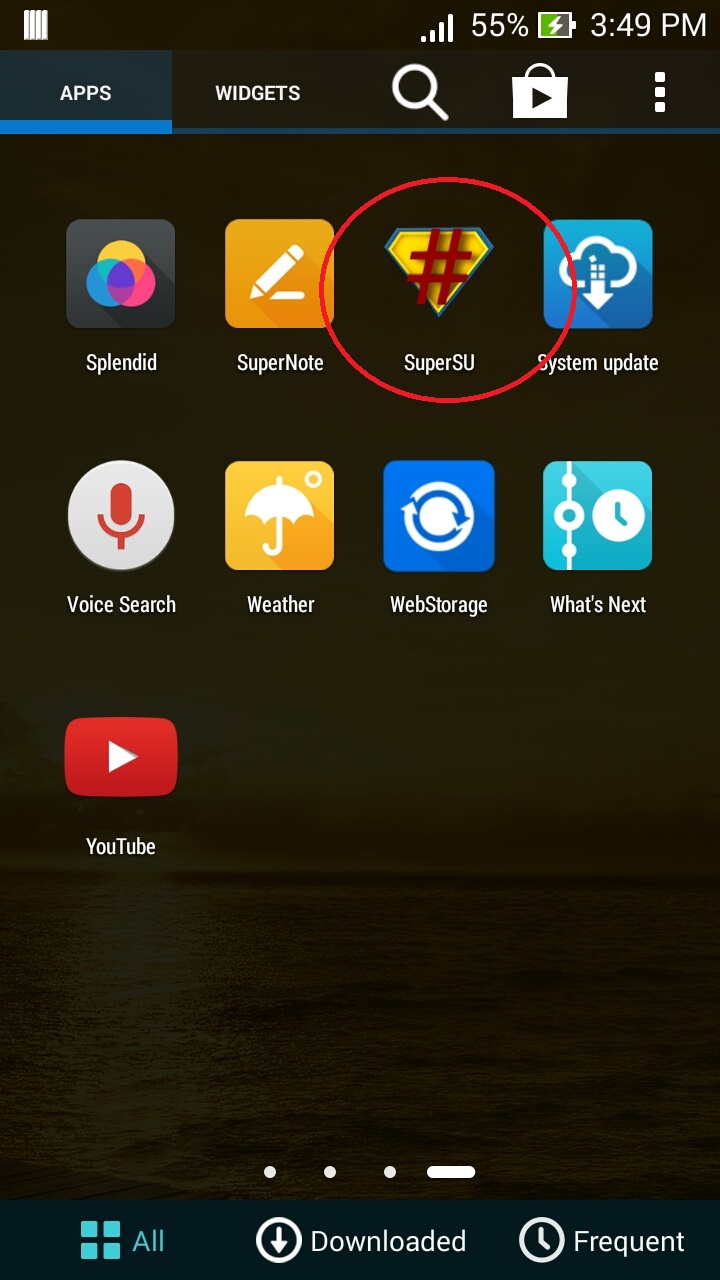
7. Last reboot will appear, check your phones app drawer, if you can see SuperSU,

Congrats! you are now rooted. Go Enjoy your phone without any limits.
You may like to read : Rooting Basics
ROOTING your phone may void warranty, Completely brick the device or even worse.
ROOT on your own risk.
The following tool and files are necessary to carry on the ROOTING process:
1. ROOT TOOL:
Link : http://www.mediafire.com/download/p5vauei9sd79oa1/RootZenFone5KitKat.zip
2. Intel Drivers:
Link : iNTEL Driver
3. A PC running Windows OS. (Preferably Win7 - as I used)
STRICTLY FOLLOW THE STEP BELOW :
1. Install the Intel driver first.
2. After its been installed, Connect your phone to the PC using USB cable. Before that, Make sure you switch on USB Debugging in the setting in the phone side. Its not easy to turn on debugging in ASUS Zenfone 5. Read the note below.
NOTE: In ASUS ZENFONE 5, the developer option is hidden by default. To enable this, Go to,
Settings -> About -> Software Information -> Build Number. (TAP 7 TIMES)
Then go back to,
Settings -> Developer Options -> USB Debugging -> Check it.
3. Test for authorized connection between phone and PC. To do this, Go to the downloaded ROOT TOOL Zip file, Extract the content to a folder and (hold shift and right click) "files" and select "Open command prompt here" type "adb devices" and press enter. The command prompt should return as below:

If unauthorized appears, you should not proceed. Unplug the device and plug in again and try until you get as displayed.
4. Please read the following instructions carefully. The upcoming is we will root your phone. Now, stay connected to your pc with your phone and open the folder you extracted "rootz5kitkatv2" from the download file. Double click "root-zenfone5-ww" or "Root-ZenFone5-en"
5. The bat file will open and the rooting process is now started. Your phone will reboot 5 to 6 times. Just press any key to continue. Wait for some more time until you see this last screen.

6. If your phone is locked and showing the lock screen and the ROOT process is stopped, Open the screen lock and Allow USB debugging (Press OK) to continue.

7. Last reboot will appear, check your phones app drawer, if you can see SuperSU,

Congrats! you are now rooted. Go Enjoy your phone without any limits.
You may like to read : Rooting Basics
Comments
Post a Comment